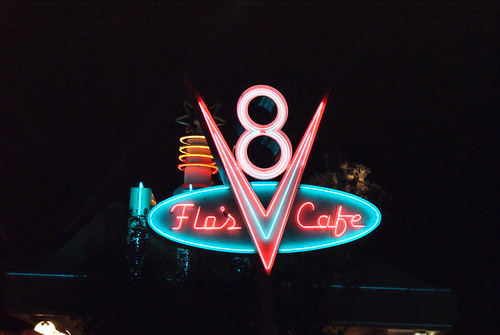
Here's a pic of my sign.

I think my version is a pretty good copy.
So how do you go about recreating a neon sign in just a few short days? Well, I'd love to have the workshop and skills to make it out of real neon tubes and such, but no such luck on either count. What I do have is some electronics background, mat board, poster board, cross connect wire, toothpicks, an awl and a source for some EL wire. First order of business was to draw out the basic shape of the sign

I'd love to say I drew that freehand, but I cheated and used a projector and traced it out. Next task was to find something to use in place of neon tubes. EL wire was the obvious choice. I ordered up some pink and aqua to match the photo of the real sign from Disney Land.

And this is how it looks when it is turned on. It looks much better in the dark. The party is at night so it works out well.

What I didn't realize until after the order came in was that I needed more wire than I had bought. It comes in 8.2 foot sections, clearly that should be enough for this small sign, right? Wrong. What I should have done before finalizing the order was to estimate the actual length needed. I did this once the wire came in and I planned out the wiring path. I was about 2-3 feet short.

So I ordered some more pink EL wire and got to work laying out what I had on hand. I poked holes in the mat board with the awl and fed the wire through and shaped it to match the sign. I poked smaller holes along the path of the EL wire to use to secure the wire to the mat board.

Once I had a section laid out how I wanted, I looped some small copper wire (any wire would have done, but I have several spools of cross connect wire on hand that worked well once stripped of the insulation) through the small holes and around the EL wire. On the back I tied the copper around some toothpicks to secure the location of the EL wire.

Once the wire is secured on the back, it holds the EL wire firmly in place on the front side. You don't really notice the small loops of copper wire when the sign is on. If it bothers you, I'm sure that mono filament fishing line or something like that would work as well, but the wire is easy to tighten by simply twisting it up instead of having to tie a bunch of small knots. I had thought of using zip ties, but they are very wide in comparison and would have been visually distracting.

I wasn't able to do the whole pink portion with what I had on hand, but the sign was definitely turning out well.

I got more pink in the mail and finished up the rest of the sign in the same manner. The final result turned out great.